How to Install
Hardwood Flooring
"How to install hardwood flooring" is very available reading material. This is simply my perspective and it is not intended to counter anyone else.
I encourage you to compare "How to install hardwood flooring" instructions as you would recipes.
My view is simply the long view. My concern is the longest possible life for your wood floor. Please, for your sake or the sake of your floor, leave this project to a Floorwright if
you don't have the time, the aptitude, or the right tools. Believe me, you will only be as good as your tools. So, you've taken the pledge. You've thoroughly studied the guidelines for the longest life of your wood floor. You've purchased, delivered, acclimated your wood. Check, check, and check.
Got your underlayment, nailer and fasteners. Prepped your subfloor. Level and sound as can be. All check.
The next item on the punch list says, "install wood floor".
Sounds so easy.
And here you are, "How to install hardwood flooring."
"Well...maybe I'll cut the grass just one more time..." you sigh.
Come on, Junior. Let the old guy give you some advice. Take it or leave it, but the stalling is over, right?
Let's start with a traditional take on things.

The Nail Down Installation
Mark your joist locations...
...because you do remember from the longest life guidelines that a wood floor should span the joists, right?

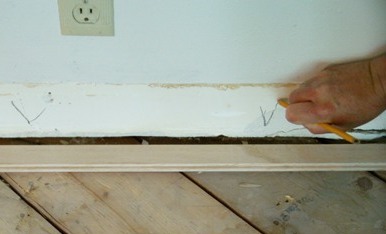
Pull a string parallel with one of your outside walls. Why an outside wall? Because at the time your home was built, those walls went up first directly over the footings and are simply truer than any inside wall.
This does not mean you have to start your installation at an outside wall. The floor below was started on an inside wall by simply measuring over from the outside wall and pulling a parallel string, parallel with the outside wall and about a foot from your inside wall.
In this photo, the string is the straight yellow line just to the right of the underlayment's uneven left edge. See it?
The first row is the most important. Select your longest, straightest boards and cut the last one to length, (leaving a 1/4" gap on either end.) When you have these boards parallel with your string, and at least a 1/4" from the wall...
...Top-Nail Into Joists
Cut Wedges...
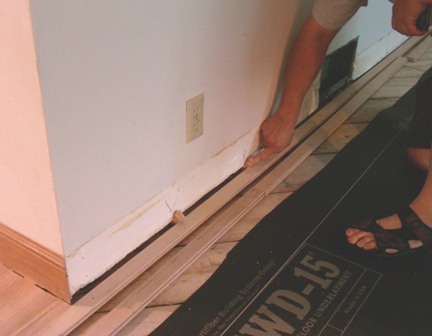
and tap those in between the wall and first board to maintain your expansion gap and to nudge that first board closer or farther from the string, as needed.
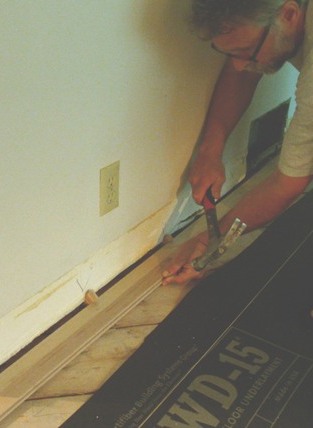
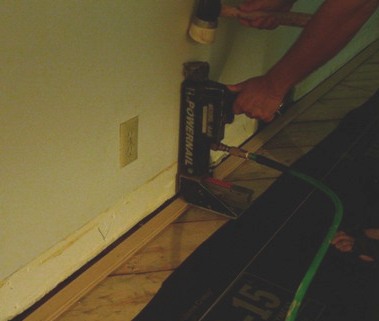
Pre-drill holes and blind nail the first few rows using 8 penny finish nails. A pneumatic nailer like PowerNail Model 445 S/N, or a finish nailer that shoots 15 guage nails can also be used.
I do prefer the hand-nailing, however, just for the control. I am less likely to budge the board out of parallel with my string.
If any butt ends fall between joists, these should also be nailed on either side of the butt end, about 3 inches from it.
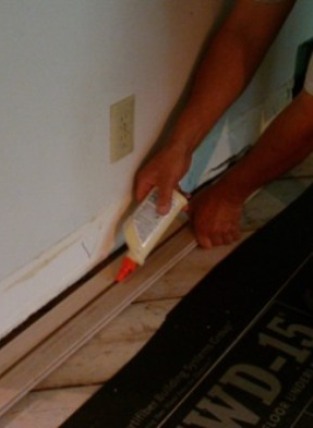
The second row is blind nailed, NOT top nailed, with wood glue in the seam between the first and second rows.
Your nailing pattern will vary depending on the width of your boards. Nail within 3 inches of a butt end on either side, regardless of board width, and then I recommend:
for nominally 1 1/2" material, a nail every 12 to 14 inches.
for nominally 2 1/4" material, a nail every 10 to 12 inches.
for nominally 3 1/4" material, a nail every 8 to 10 inches.
for nominally 4" or 5" material, a nail every 6 to 8 inches.
for any thing wider, a nail every 4 to 6 inches.
When you feel your first few rows are straight, parallel, and secure, it's time to remove your string and roll out the underlayment, cut to length, and tack hammer on both ends.
Two staples per end, please. No more is necessary, and deeply set these staples so as not to fight with the flooring.
This is a fine time to sort your flooring by length...
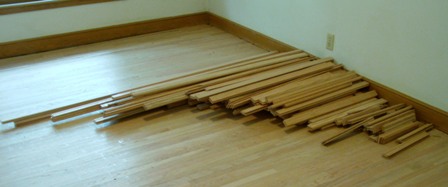
...and begin "racking out".
That's floor guy talk for layout. Hey you wanna look like a floor guy for a few days, so you might as well sound like one.
When the guys at church comment on your haggard appearance, be sure to mention the "racking out" part of your Saturday. Refrain from calling anyone a butt end, however. Bad form.
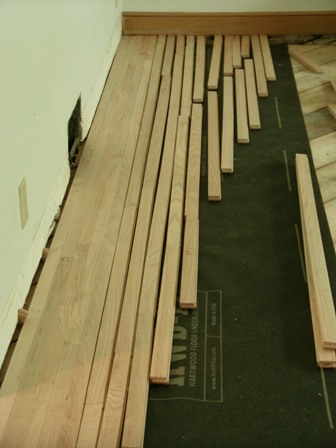
Anyway, the pattern you want to create with your butt ends, (not your church buddies, remember,) is staggered, nicely varied, avoiding any repeating patterns. Continue to install and enjoy the middle of the floor.
Find a rhythm of cutting starter boards, racking out, nailing up, cutting finishers.
Vary those starters to avoid repeating patterns. In fact, your starter boards will be the left over portion of the board you cut to finish a row.
So if you only need a 12" board to finish a row, cut that off the end of a 5' board and you have a 4' starter. Magic.
How to Install Hardwood Flooring Up to a Wall
How to Install Hardwood Flooring Under A Door Frame
Working Around a FireplaceHow to Install Floor Vents
Return to Install Wood Floor from How to Install Hardwood Flooring


For technical assistance, check out these recognized authorities in the wood floor industry.
The National Wood Flooring Association
The Maple Flooring Manufacturers Association
By Jerald Adamsson, Copyright 2007 - 2025
www.woodfloorconservancy.org
ALL RIGHTS RESERVED
New! Comments
Have your say about what you just read! Leave me a comment in the box below.